How do you create bracket pairs in math equations?
Any time brackets are added into math, both left and right hand brackets are created simultaneously. Inserting bracket pairs into your equations can be done through pressing the \ key and then selecting the desired brackets from the search menu, or by simply choosing a bracket pair from the bracket menu (![]() ) as shown below.
) as shown below.
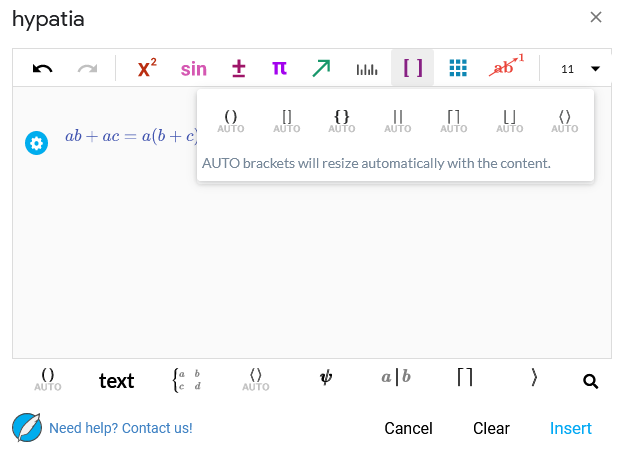
The AUTO underneath each bracket pair symbol just indicates that the brackets will resize automatically to fit whatever is contained within the pair.
Alternatively, if you already have math written out and want to enclose part of your equation in brackets, simply highlight the part of the equation to be enclosed and then insert a bracket pair as described above.
Just as brackets can only be created in pairs, the can also only be removed in pairs. To remove a pair of brackets, position the text cursor to the right of either bracket in the pair and hit the Back Space key. Hitting the Back Space key a second time will remove the bracket pair from the equation but the math inside the brackets will be kept.
How can you mix bracket types?
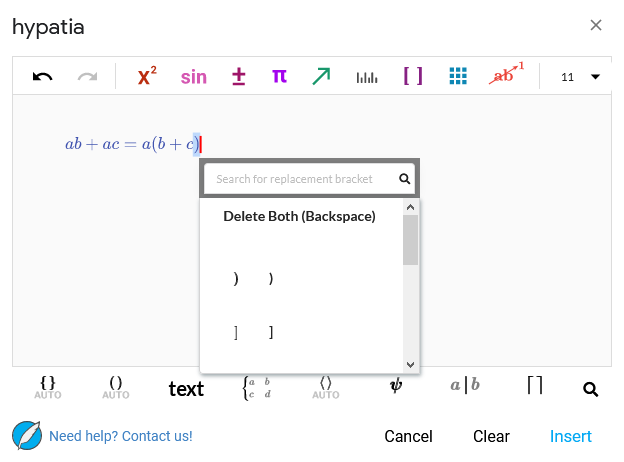
To change a bracket type, position the text cursor to the right of a bracket and hit the Back Space key. This will bring up a menu from which you can choose to delete the bracket pair or change the bracket type of the specific bracket the cursor is positioned behind as shown below.
How do you add cases into math equations?
Cases can be added into your equations either by pressing the \ key and searching for cases or by choosing cases from the matrix menu (![]() ) as shown below.
) as shown below.
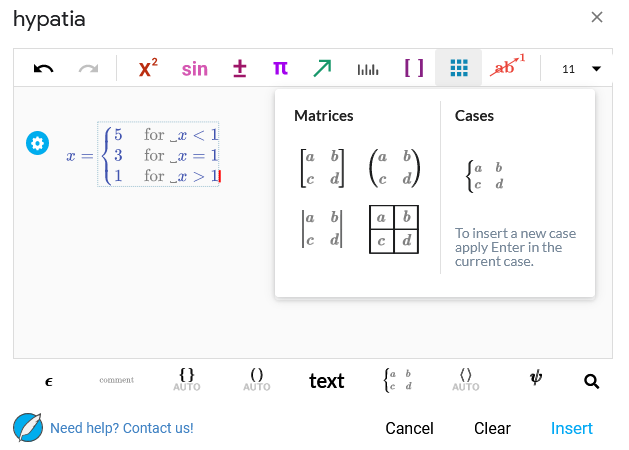
Cases that are added into your equation will default to 2 rows. Additional case rows can be added by pressing the Enter key as if you were crating a new line.
Miscellaneous
There are some math symbols that do not appear in the menus and can only be added into your equations using the \ key and searching for their name directly. One example of a symbol that does not appear in the menus but can be useful when dealing with brackets is the giventhat symbol which is just a single vertical line. A potential use of this symbol is demonstrated in Example 2.
Example 1
Let’s work through how we could write the math shown below using hypatia.
![]()
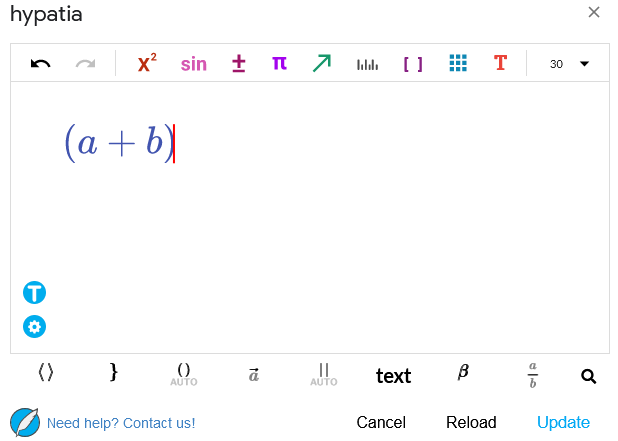
Start by opening the editor and choosing the round brackets from the bracket menu (![]() ). This will insert a set of round brackets into the editor window. Next, let’s type
). This will insert a set of round brackets into the editor window. Next, let’s type a+b and then position the text cursor behind the last bracket as shown in the image below.
Now we can hit the Back Space key which will bring up a drop down menu from which we can choose the curly bracket. This will turn the right hand round bracket into a curly bracket. Next, let’s hit the [ key to insert a pair of square brackets and type b+a. Let’s position the text cursor behind the first square bracket as shown below.

Finally, hit the Back Space key to bring up the drop down menu again. From here, let’s choose the angled bracket to complete the math we wanted to type.
Example 2
Let’s now make use of the giventhat symbol to type the following:
![]()
Let’s open up the editor and type f and then a single round bracket (. This will insert a pair of round brackets between which we can type x. Using the arrow keys to move outside of the brackets, let’s type = and then hit the \ key. This brings up a menu from which we can search for any math symbol. Let’s type giventhat in the search bar and choose the only remaining entry. This will insert the giventhat symbol into the math with a box on either side of it as shown below.
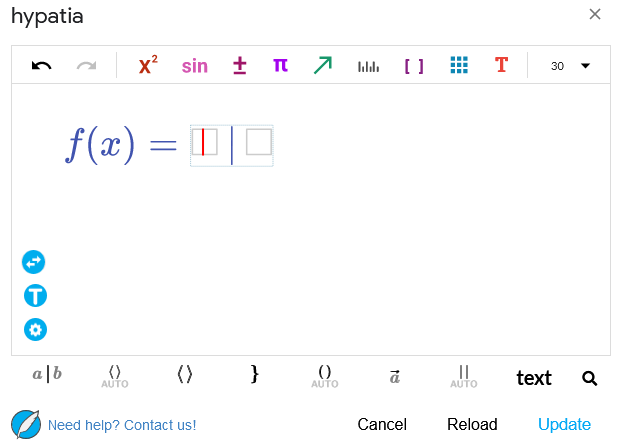
We can then fill in the left box with 2x+1 , use the arrow keys to move the text cursor to the right of the giventhat symbol and then continue typing x<3 to complete our math expression.